Learn AI Photo Relight

Use our ai photo relight tool to change the lighting of any photo online. Describe the new light source, direction, color temperature, and mood. The ai photo relighting model keeps your original composition and replaces only the lighting.

Learn ai photo relighting step by step

This ai photo relight tool is designed for beginners. Follow three practical exercises to understand how the ai photo relighting model interprets light direction, color, and intensity. Each example teaches a different technique you can adapt for your own photos.

Studio softbox portrait lit with an ai photo relight tool showing soft catchlight in the eyes

Tutorial 1

Relight a portrait with studio softbox lighting using ai photo relight

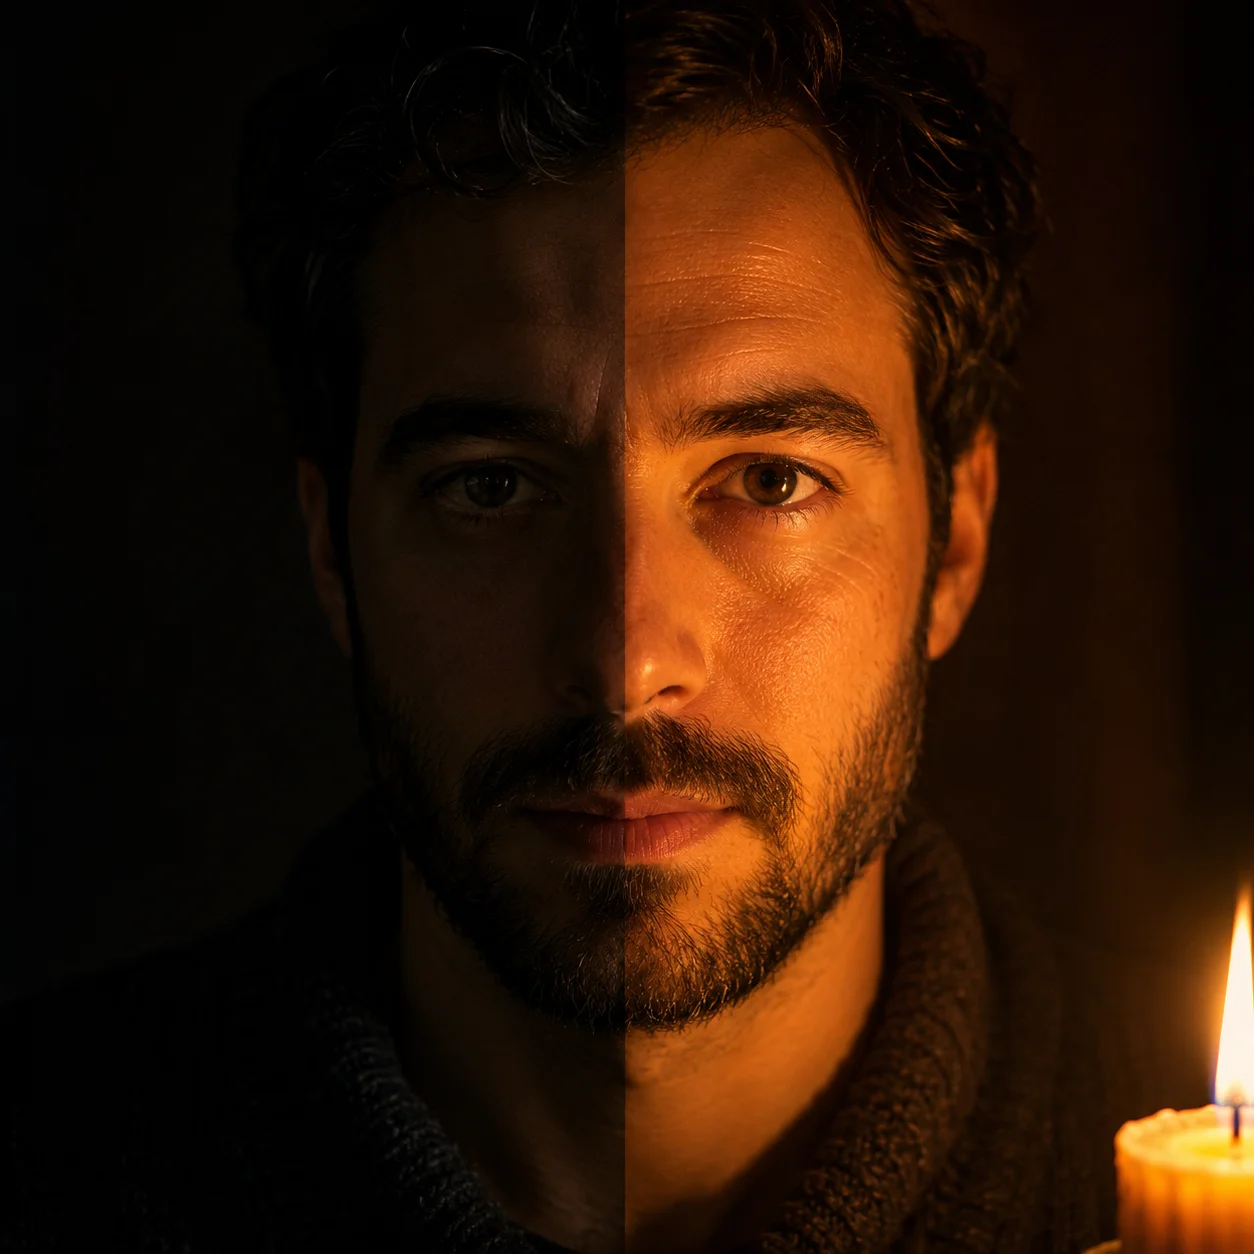
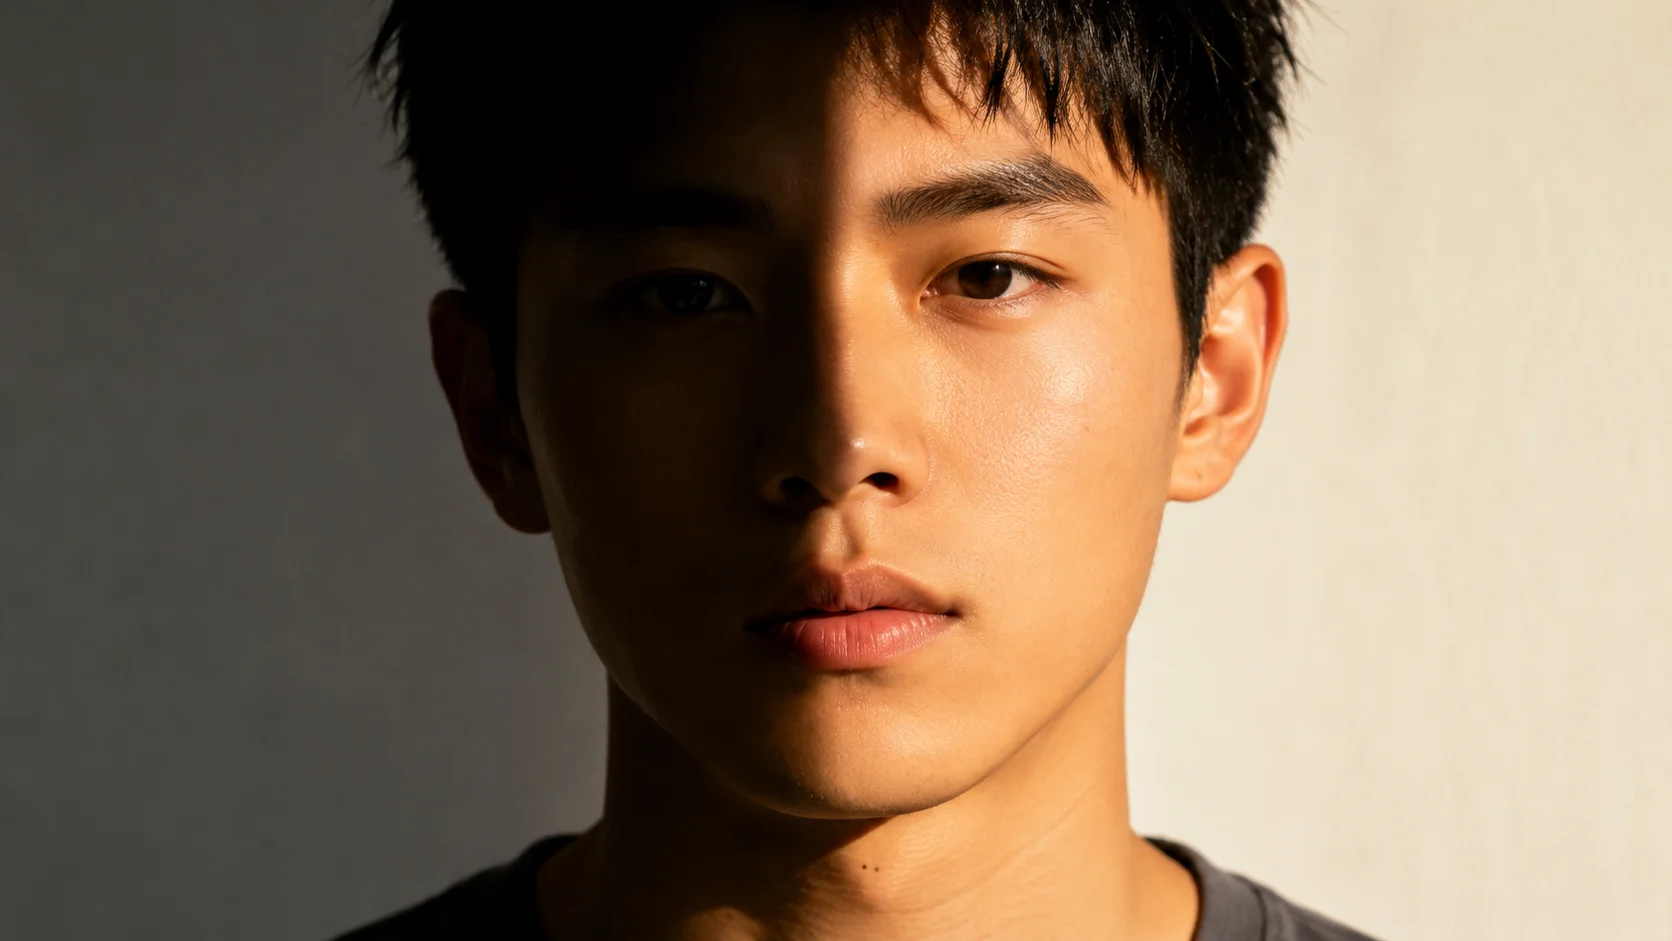
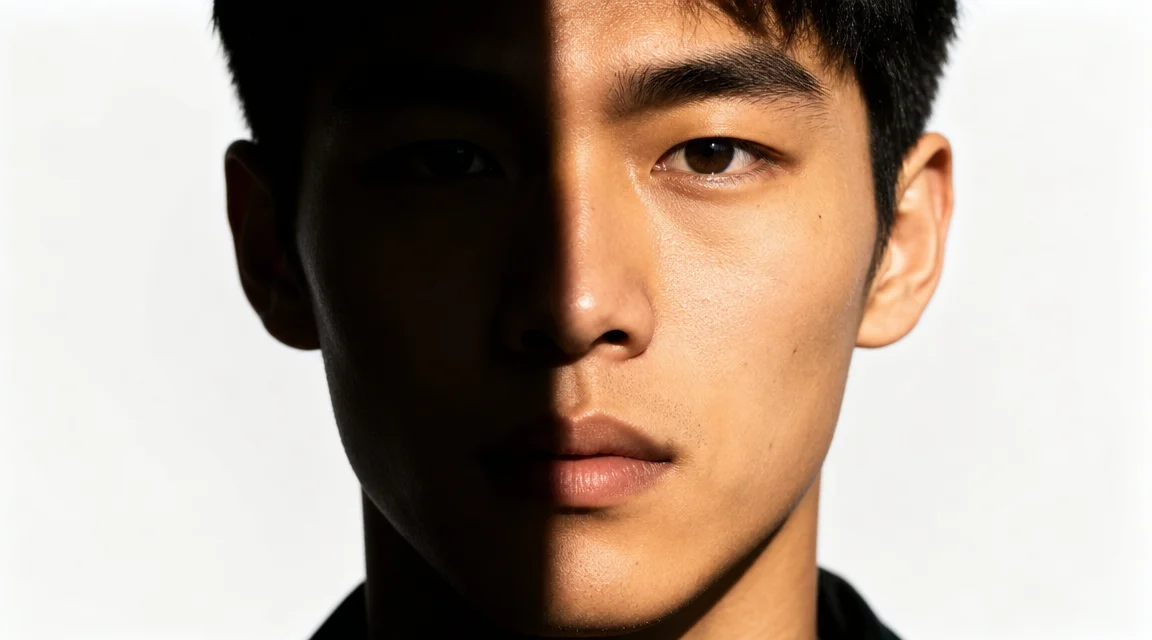
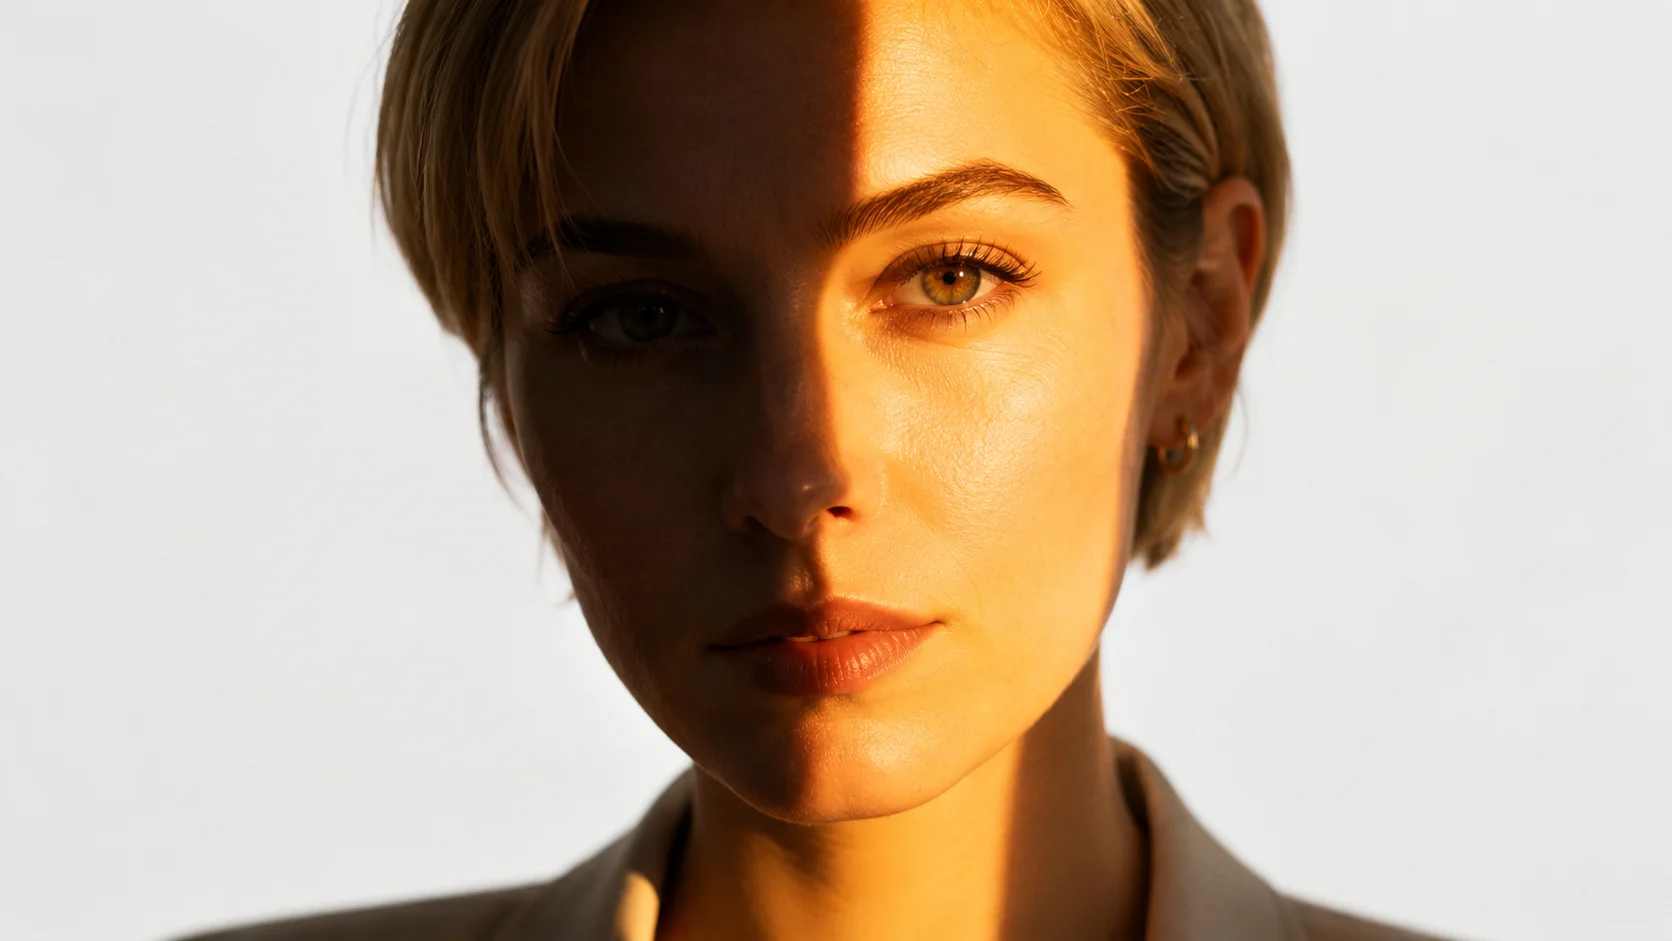
Start your ai photo relight learning with a standard studio setup. Describe a large rectangular softbox placed 45 degrees to one side of the subject. Notice how the ai photo relighting tool keeps skin texture realistic while changing the shadow pattern. The catchlight in the eyes should be a soft broad rectangle rather than a small dot, confirming the model understood the light source shape. Use this technique for clean professional portraits without buying studio equipment.

Softbox setupCatchlight detailStudio portrait
Candlelit dinner scene created with ai photo relight showing warm flame lighting across a table

Tutorial 2

Create a candlelit scene with your ai photo relighting prompt

For your second ai photo relight tutorial, try a single candle as the only light source. Write a prompt placing a lit candle in the center of a dark room and describe how the warm flame light falls upward onto faces. The ai photo relighting model produces orange-gold color temperature, deep shadows, and soft glows. This exercise teaches how the tool handles extreme contrast between bright and dark areas. Compare the warm candlelit result with the cool studio result from tutorial one.

Candle lightWarm colorDeep shadows
Dramatic spotlight stage portrait using ai photo relight with high contrast shadows

Tutorial 3

Use a single spotlight for dramatic ai photo relighting effects

The third ai photo relight exercise uses a single hard spotlight from above for dramatic highlights and deep sharp-edged shadows. Describe overhead light so the chin, nose, and brow cast strong shadows downward. The background stays dark to emphasize contrast. This technique suits stage photography, film noir portraits, and artistic editorials. Once you master these exercises, you can relight photo with ai in any style.

Hard spotlightHigh contrastDramatic mood
Step-by-Step Guide

How to use the ai photo relight tool

Follow this step-by-step ai photo relight tutorial to create your first relit photo. The workflow works for any scene: portraits, products, or still life. Each step teaches you what to write and what to expect from the ai photo relighting model.

1

Upload a photo or write a scene description

Decide whether to relight an existing photo or create a new scene with ai photo relight from scratch. If you have a photo, upload it as a reference. If starting fresh, describe the subject, setting, and objects in your scene. Be specific about position, background, and props. This step sets up what the ai photo relighting model needs.

2

Describe the new light source in detail

Tell the ai photo relight tool what kind of light you want. Specify the light type (window, softbox, candle, spotlight), direction (upper left, from behind), color temperature (warm golden, cool blue), and intensity (soft and diffuse, harsh and direct). The more specific your description, the better the ai photo relighting output will match your vision.

3

Generate the relit photo and review the result

Click generate and watch as the ai photo relight tool applies your new lighting. The model keeps the original subject while changing shadows, highlights, color temperature, and mood. Check if the shadow direction matches your described source, color temperature is correct, and highlights are on the right surfaces. If close but not perfect, refine your prompt and try again.

4

Download your relit photo and share it online

Once the ai photo relight output looks right, download it in your preferred resolution. Use your relit photo for social media, product listings, or creative projects. The ai relight free photo online workflow lets you experiment with different lighting styles at no cost. Save multiple versions of the same photo to compare how each light source changes the mood.

AI photo relight prompt ideas for beginners

Try these ai photo relight prompt templates to practice specific lighting techniques. Each example explains the goal, prompt structure, and expected result. Use them as starting points and adjust the light direction, color, and intensity for your own photos.

AI Photo Relight — Common Questions

Common questions about using the ai photo relight tool, how the ai photo relighting model works, and what you can achieve with relight photo with ai techniques.


Start your first ai photo relight tutorial

You have learned ai photo relighting basics through three exercises: studio softbox, candlelit scene, and dramatic spotlight. Now write your own prompt, choose a light source, and generate your first relit photo. Each attempt teaches you more about how the ai photo relighting model responds to light description. Start your ai photo relight journey today.